Wednesday, August 29, 2012

Roasted Brussel Sprouts with Garlic Aoili

So I've never been a fan of brussel sprouts. And I have no idea why since I have nothing to back them up with since I've never tried them. When I was little, my dad hated them. He would say they tasted like feet. Well, what kid wants to eat a vegetable when the dad says that right? And I've heard so many of my friends growing up not liking them. Well, it turns out, THEY ARE FREAKING DELICIOUS! I went to a restaurant called Eleven Plates here in Austin, and let me tell you that they are life changing! Brussel sprouts officially speak to my soul...and then I had them at another restaurant called The Grove...also delicious!


Well, considering that I had these revelations with this amazing vegetable, I had to figure out how to make them. Did some research and found out, they are so simple to make! The whole dish literally took me a total of 25 minutes to make! And since I had been talking to my husband about them nonstop, he was interested to see how they would turn out. My husband is not a huge fan of veggies..but he ate them like it was candy! You gotta try these and have your world turned upside down! Quit believing all those people out there who say they suck! They could not be more wrong...

Ingredients:
For the sprouts:

15-20 brussel sprouts
1/4 cup of vegetable oil
1 1/2 tbsp of coarse sea salt
1 tsp of fresh ground pepper
1/2 tsp of red chili powder
 2 tsp of garlic powder
1 tbsp of sugar

For the aoili:
5-6 tbsp of mayonnaise
4-5 cloves of garlic, minced
1 tsp of fresh ground pepper
Juice of one lemon

Directions:


Preheat oven to 400 degrees. Start with your brussel sprouts and give them a good wash!


I cut the sprouts into wedges and got them into a bowl.


I put them in a bowl because it's easier to marinate them and make sure they all get evenly coated. Coat these with the veg oil, sea salt, black pepper, red chili powder, garlic salt & sugar. The sugar helps caramelize these bad boys which makes them unbelievable!!

Get them onto a baking sheet covered with foil and pop them into the oven. You're gonna want to cook these for about 20 minutes, flipping them once in between.


While these are roasting, start on the aoili. I just use this type of mayo...nothing fancy...


Get this into a bowl. Then mince up those cloves of garlic.


Stir these into the mayo. Add in the pepper and the lemon juice and done! Stick it in the fridge until ready to use. 

Once the twenty minutes are up, broil for about 4-5 minutes. You might want to keep a watch on it. You'll end up with this beautiful char...mmmmm. Once they are out of the oven, mix in the aoili and they are ready to eat! Simple right? Yup, my thoughts exactly for something this delicious.


Roasted goodness smothered in a delicious sauce...what more could you ask for? ENJOY! =)

Wednesday, August 22, 2012

Chicken & Broccoli Stir Fry

I often have cravings of chinese takeout because I'll be first to admit that I loooove it and think it's delicious! Well, it tends not to be the healthiest considering you have no control of the ingredients. So one night, I set out to make one of my favorite dishes with stuff that I had in my fridge and pantry already! Lemme tell you, SUCCESS! This dish came together in about a half hour and it was amazing and super flavorful!


Ingredients:
3/4 - 1 lb of boneless, skinless chicken thighs, cut into 1/2 inch strips
1 tbsp of sambal oelek
2 tbsp soy sauce
2 tbsp of oyster sauce
2 tbsp of rice vinegar
1 tbsp of cornstarch
1 tsp of sesame oil
2 tbsp of vegetable oil
3 cloves of garlic, thinly sliced
1 inch of ginger, thinly sliced
3 scallions, thinly sliced
5 baby corn, sliced
1 bunch of broccoli, cut into small florets
cooked white rice, for serving

Directions:


Start with chopping the broccoli into florets. 


Thinly slice your scallions.


You can chop the baby corn coarsely or slice it up...up to you or whatever is faster right?


Thinly slice both the garlic and ginger.


Last but definitely super important, the chicken! You want to cut this into this strips so it cooks faster and is more bite sized.


Don't forget to wash your hands!

Let this hang out while you mix together a few ingredients into a sauce. Whisk together the sambal oelek, soy sauce, rice vinegar, oyster sauce, cornstarch, and sesame oil. You can still see the pockets of cornstarch in my picture..make sure yours is all blended! I blended mine thoroughly before I added it to the dish...I know you were judging...


Alright, now in a wok or large skillet, heat the vegetable oil over high heat. Add the chicken and cook until browned..anywhere between 7-10 minutes. 


Next, add ginger, garlic, scallions, broccoli, & baby corn. Stir this frequently, until broccoli is bright green. About 3 minutes or so...


Afterwards, you may want to add about a 1/4 cup of water, scraping up browned bits with a wooden spoon. Then, stir in soy sauce mixture and cook, until the sauce has thickened...should start to look something like this...


After all is coated, serve with the warm rice! Ta da!! Easy peasy right? 


YUM!


Hope yours turns out just as delicious! This made us around 4 servings so we had this for lunch the next day! 30 minutes and two meals? YES PLEASE!

Wednesday, August 15, 2012

Red Velvet Cake Balls

How much do you love red velvet cake? Or red velvet cupcakes? Or basically, red velvet anything? ME? I LOVE IT ALL. If it's red velvet, I'm eating it...there is no doubt about it. I know that cake balls have recently come into the scene quite a bit. The ones I always end up eating that are from different bakeries tend to be too large and too sweet...not my cup of tea. They are good but not as good as I know I could recreate! So, I set out to study a few recipes to figure how to get the best red velvet cake ball...AND, I found it! It was off Bakerella!


Now, I will warn you that while these are easy to make, they are labor intensive! However, once you make them, you yield anywhere from 55-65 depending on how big you make the actual cake balls.  Take that random Sunday afternoon to do it, and you will be glad since you'll have dessert over the next few days!

Ingredients:
1 box red velvet cake mix
1 16oz. can cream cheese frosting
1 package chocolate bark
parchment or wax paper

Directions:


Start with the cake mix. Here is the one I used...excuse my un-manicured hands...


Turn that into the batter...isn't this so pretty?


After you've baked the cake, let it cool completely. Crumble it up and mix in your cream cheese frosting. You want to make sure you mix it thoroughly...I warn you, this will be messy but what's cooking without a little bit of mess right?

You'll take the mix and roll into little balls. I put them on a baking sheet that had parchment paper.


Stick these into the fridge for about 2-3 hours so they hold their shape and form better. You can always speed up the process by putting it in the freezer but I'm not sure how long since I haven't done it before myself! Apparently, I had a lot of time while making these...you know, watching that trash TV while this was hanging out in the fridge..productive aren't I?

After you've chilled these bad boys for a while, take them out so can be ready to be coated in delicious chocolate! I just used plain ol' milk chocolate...feel free to mix it up with white or whatever your lil' heart desires!

I didn't realize I didn't have enough chocolate so some mine turned out a little less chocolatey..but did they taste any different? NO SIREE.  Still just as delicious!


Hope all that work pays off for you! It definitely did for me! I took some to work for the following day and people loved them and were obsessed! A good sign if you ask me...

Thursday, August 2, 2012

Fresh Bruschetta

We were at an awesome restaurant for happy hour the other day and we ordered bruschetta. It was A.M.A.Z.I.N.G.!!!!! I went through the menu to see the ingredients listed to see how to make it and how I could tweak it to make it even better! We went straight to central market, bought all the ingredients, and just ended up eating more bruschetta for dinner!


Ingredients:
Handful of fresh basil leaves
Two large roma tomatoes
1/3 cup of kalamata olives
4 garlic cloves
1/4 cup of chopped red onion
3 tbsp of balsamic vinegar, divided
Loaf of bread
Salt to taste
Pepper to taste

Directions:
Preheat the oven to about 275 degrees. Start with chopping up the tomatoes.


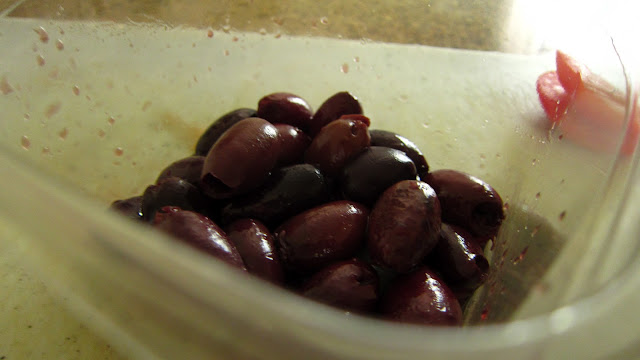
I halved the olives but you can also give them a rough chop if you're short on time.


Mince the garlic and the onion. MMMMM...plump juicy garlic.


A  bit of red onion...


Last but not least, cut the basil into strips.


Mix all of this in a bowl and add about 2 tbsp of balsamic vinegar. You can also toss in salt and pepper to taste.


Let this just hang out and marinate while you focus on the bread. 
I just chose a regular loaf from central market...nothing too fancy.


Sliced it relatively thin...about a half-inch thick per slice.


Arranged it in a baking sheet and put it in the oven to toast for about 6-8 minutes. After it was a little crispy, I poured the rest of the balsamic vinegar over the slices. It looks weird...I know. Trust me, it tastes delicious!


Now add the tomato mixture onto each bread piece and voila! Freshest, bestest tasting bruschetta ever!


Enjoy!